

Sitecore Experience Accelerator (SXA) 1.8 was released on 28th November 2018. In this post I will walk you through really quick installation of this version of SXA for your development machine. This is a follow up blog post to my installation guide for Sitecore 9.1.
TL;DR
If you have installed SXA before, just download Sitecore Powershell Extensions (SPE) version 5.0 from this link and also SXA 1.8 for Sitecore 9.1 from this link. Install these installation packages through Sitecore. Then add SXA Solr cores to Solr, populate schemas and rebuild newly created indexes (follow chapters 3c) – 3e)). That’s it! Simple as that!
For rest of you let’s get started!
1) SXA 1.8 Prerequisites
1a) Sitecore
These versions of Sitecore are supported:
- Sitecore 9.0
- Sitecore 9.1 (I have chosen this one)
1b) Sitecore Powershell Extensions (SPE)
These versions of SPE are supported:
- SPE 4.7.2
- SPE 5.0 (I have chosen this one)
2) Installation preparation
2a) Download SPE installation package
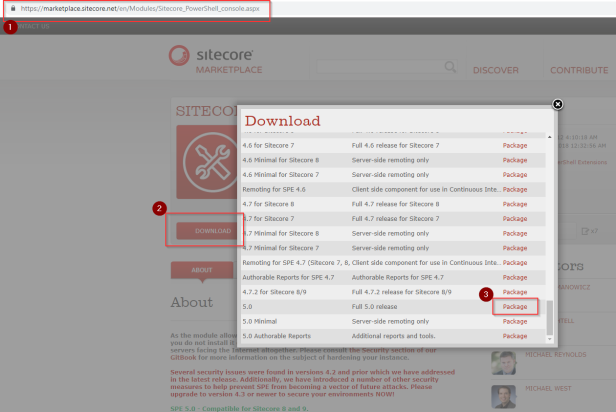
Open https://marketplace.sitecore.net/en/Modules/Sitecore_PowerShell_console.aspx and click on download button. Click on Package link on the right next to “5.0” at the end of the list to download it:
Rename downloaded file to “01 Sitecore PowerShell Extensions-5.0.zip”. Renaming is not needed but I am using this practice to know precise order for installing packages from file name.
2b) Download SXA installation package
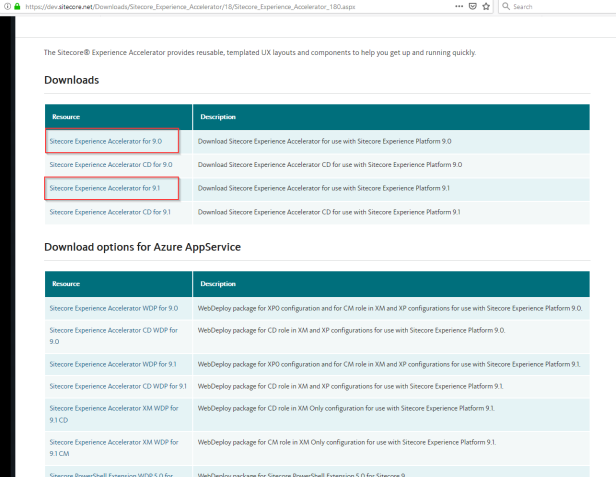
If you are planning to install SXA 1.8 on Sitecore 9.1 on dev machine, click directly on this link to download installation package straight ahead or open https://dev.sitecore.net/Downloads/Sitecore_Experience_Accelerator/18/Sitecore_Experience_Accelerator_180.aspx and download suitable file based on your Sitecore version 9.0 / 9.1 (login is needed for download):
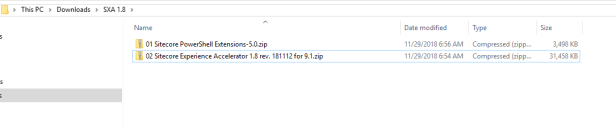
Rename downloaded file to “02 Sitecore Experience Accelerator 1.8 rev. 181112 for 9.1.zip”. Renaming is not needed but I am using this practice to know precise order for installing packages from file name.
You should end up with this download folder:
2c) Optional step – Download installation guide
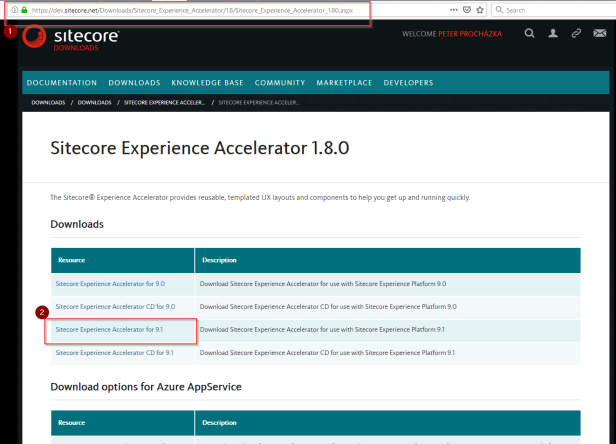
If you are following this blog posts, you actually don’t need to download them but just in case 🙂 Open https://dev.sitecore.net/Downloads/Sitecore_Experience_Accelerator/18/Sitecore_Experience_Accelerator_180.aspx and download highlighted file manually:
3) SXA 1.8 Installation
3a) Install SPE 5.0
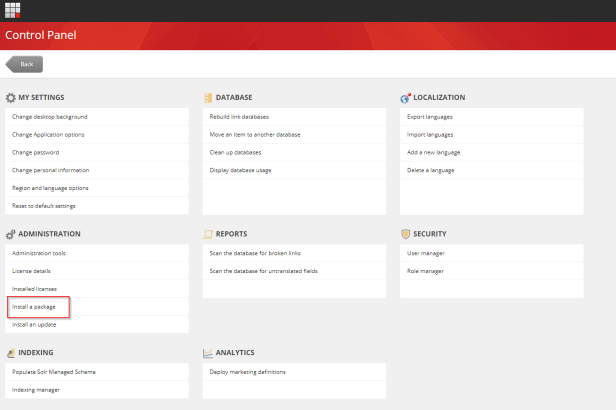
From Launchpad, open Control Panel:

Click on Install a package in Administration section:
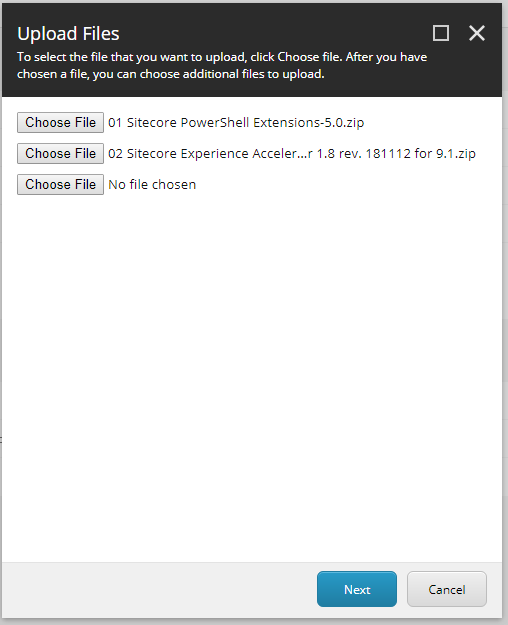
Upload both files downloaded in chapter 2) by clicking on Upload package button, choosing both files on next screen and click on Next button:
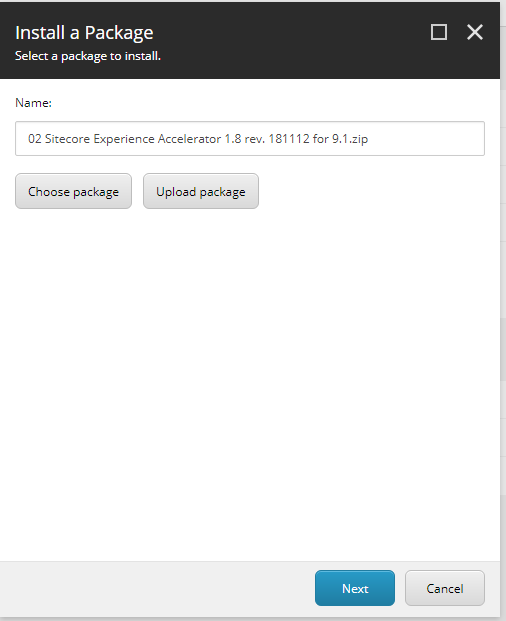
Choose first package:

Click through the wizard and wait until package is installed.
3b) Install SXA 1.8
From Launchpad open Control Panel or just stay in Control Panel screen:
Click on Install a package in Administration section:
This time choose the second package:
Click through the wizard and wait until installation is finished.
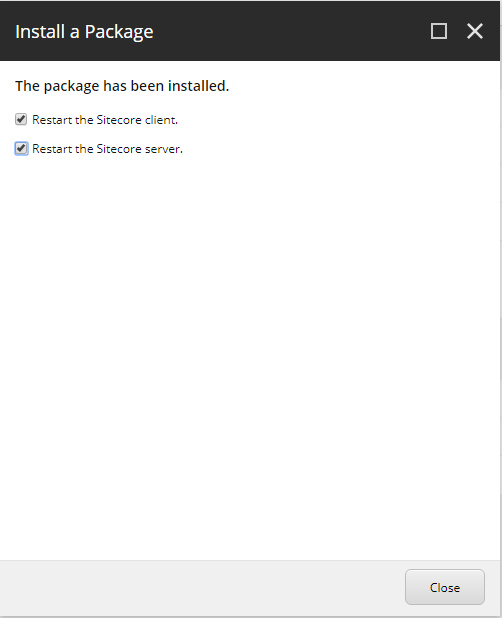
On the last screen this time also check “Restart the Sitecore server” and click Close:
3c) Configure SXA Solr cores
Last step of installation is to add two SXA specific Solr cores.
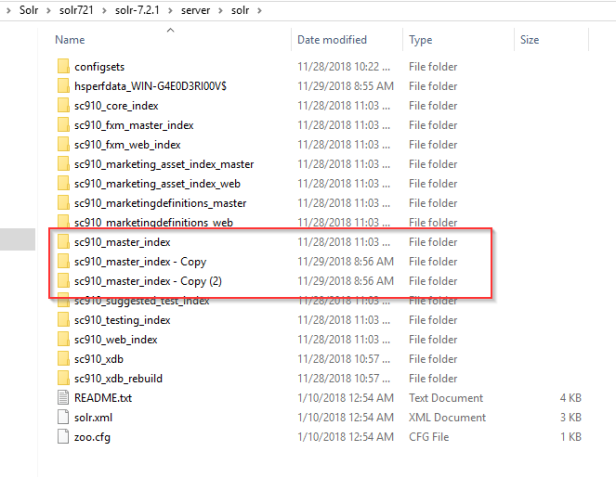
Navigate to your Solr folder and copy two times “{YourSitecoreInstanceName}_master_index” folder. If you have followed my Installation Guide for Sitecore 9.1, it should be located under “C:\Solr\solr721\solr-7.2.1\server\solr”:
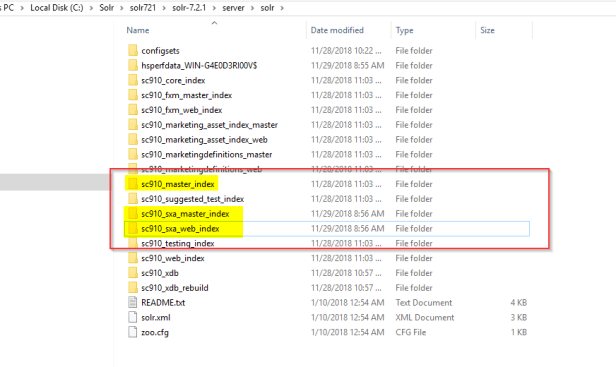
Rename newly copied folders as “{YourSitecoreInstanceName}_sxa_master_index” and “{YourSitecoreInstanceName}_sxa_web_index”:
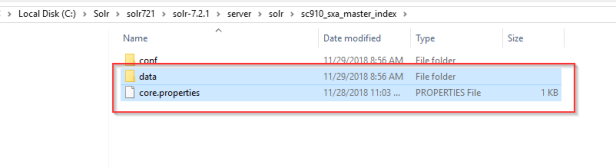
Navigate to both new folders and remove data subfolder and core.properties file as highlighted here:
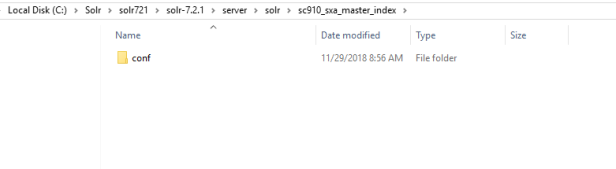
At the end you should leave only conf subfolder under both “{YourSitecoreInstanceName}_sxa_master_index” and “{YourSitecoreInstanceName}_sxa_web_index” folders like this:
Open solr admin ui in your browser. If you have followed my Installation Guide for Sitecore 9.1, url is https://solr:8983/solr/ .
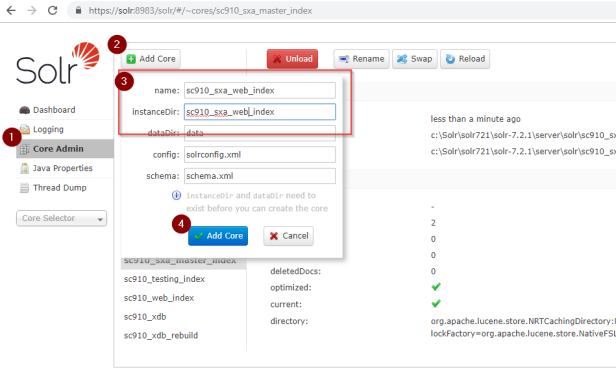
Click on Core Admin (1) in left menu and then click on Add Core (2) button with green plus as shown below. Specify “{YourSitecoreInstanceName}_sxa_master_index” in name and instanceDir fields (3) and hit Add Core button (4). Do the same also for {YourSitecoreInstanceName}_sxa_web_index:
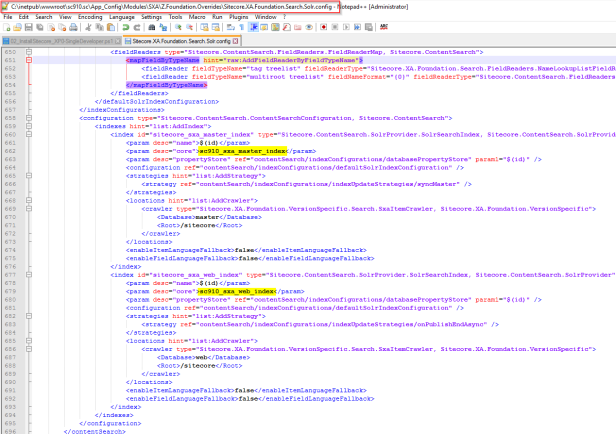
Open “C:\inetpub\wwwroot\sc910.sc\App_Config\Modules\SXA\Z.Foundation.Overrides\Sitecore.XA.Foundation.Search.Solr.config” file in your text editor and change core parameters highlighted below to your newly created cores in Solr to each index accordingly (mind highlighted values for each master/web index):
3d) Populate Solr Managed Schema for SXA indexes
From Launchpad, open Control Panel:
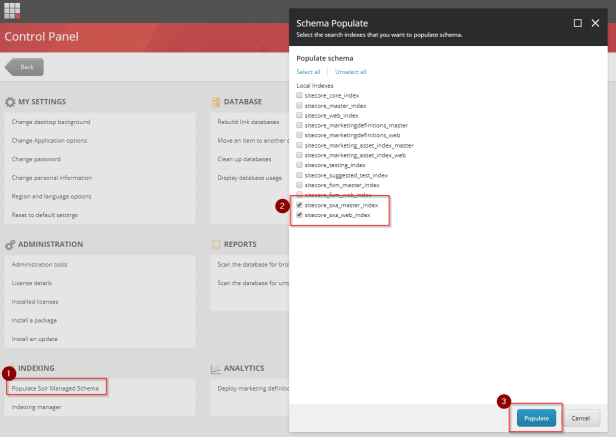
Open Populate Solr Managed Schema (1) from Indexing section, select only SXA related indexes highlighted below (2) and click Populate button (3):
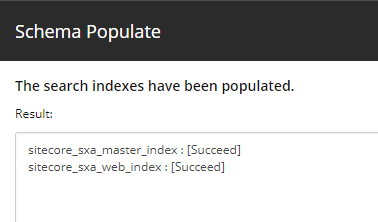
This is desired outcome:
3e) Rebuild SXA indexes
From Launchpad, open Control Panel:
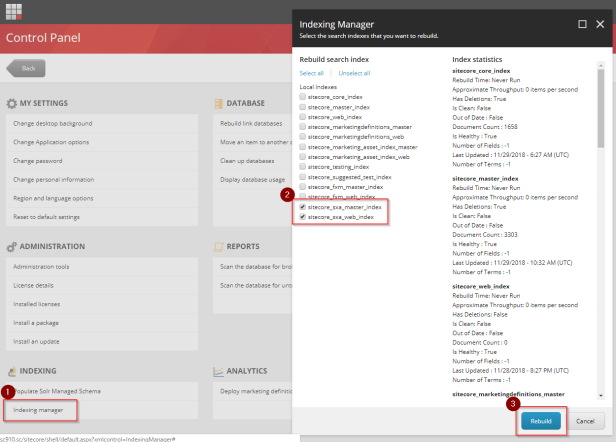
Open Indexing Manager (1) from Indexing section, select only SXA related indexes highlighted below (2) and click Rebuild button (3):
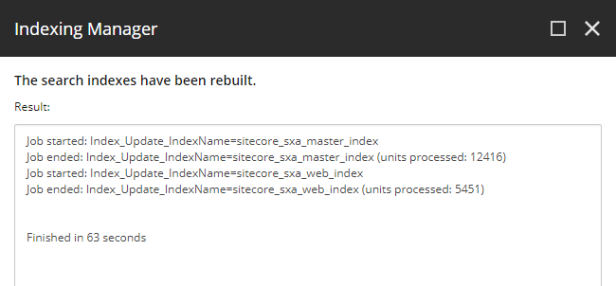
This is the desired outcome:
That’s it!
Now create tenant and site and happy content editing with SXA from first minute after installation 🙂 Thanks to Barend Emmerzaal this could be trivial task for you:
Also check his blog post with guideline about structure of sites and tenants: https://www.linkedin.com/pulse/sitecore-experience-accelerator-sxa-site-structure-guide-emmerzaal/
Cheers!
——————————————————
Used sources:

When I go through these steps I always encounter an error during the SXA package install. And it’s fatal. I have to blow away the SC instance and re-create it. I can’t post a screenshot with this comment but I end up with Server Error in ‘/’ Application with a reference to Microsoft.DependencyInjection.Adstractions. Any ideas?
LikeLike
Are you sure you have correct version of SPE and SXA for your version of Sitecore? Best would be to create question on Sitecore StackExchange with screenshots and error log appended in question
LikeLike